Over the course of our 30-Day Ab Challenge, we take an in-depth look at each of the exercises used, and this week we delve into knee tucks.
Here’s how it works: Three exercises over 30 days, and we up the intensity each day. Simple.
Think again!
Our 30 Day Ab Challenge is a great way to jumpstart that summer body training! If you have summer on your mind or you’re just looking for a new challenge, join in and challenge yourself to three different exercises—the crunch, the plank, and the knee tuck.
Today, we give you the most vital advice for knee tucks. Alright, let’s get to it!
Knee Tuck
Balance yourself on ball, find stability, and then roll the ball forward with your feet as you tuck your knees into your chest
Keep your entire core tight to stay stable throughout the movement. To avoid wrist pain, spread your weight evenly throughout all fingers and palm
By the end of the challenge, your core will be stronger, your performance at the gym will enhanced, and your confidence will be boosted. Remember to track how you improve with each exercise, how you look, and how you feel. You’ll be surprised with the results!
Over the course of our 30-Day Ab Challenge, we are zeroing in on each of the exercises used, and this week we focus on the plank.
Here’s how it works: Three exercises over 30 days, and we up the intensity each day. Simple.
Think again!
Our 30 Day Ab Challenge is a great way to jumpstart that summer body training! If you have summer on your mind or you’re just looking for a new challenge, join in and challenge yourself to three different exercises—the crunch, the plank, and the knee tuck.
Today, it’s all about plank advice. Do the stated reps and hold time, adjust as needed and work your way up! Now, let’s get started…
The Plank
There are two different ways to do a plank on the exercise ball: Put your feet on the ball and hands on the ground, or have your elbows on the ball with your feet on the ground
Keep your whole core tight on this one
Use your back muscles, glute muscles, and abs to keep your body in a straight line
Don’t stick that booty too far up in the air or let it sag
Over the next three weeks, we’ll zero in on each exercise used in the 30-Day Ab Challenge exercises. Today: The Crunch.
Here’s how it works: Three exercises over 30 days, and we up the intensity each day. Simple.
Think again!
If you’re looking for a new challenge or have summer on your mind, it’s time to kick it up a notch. It’s never too early to get started and this 30 Day Ab Challenge is a great way to kick-start that summer body training!
You’re going to challenge yourself to three different exercises—the crunch, the plank, and the knee tuck.
Today, we begin with tips for the crunch. Do the stated reps and hold time, adjust as needed and work your way up! Here we go…
The Crunch
Keep your feet flat on the ground, lean back over the ball, and keep core tight to pull yourself up
Find a position on the ball that works best for you to stay balanced and have the largest range of motion
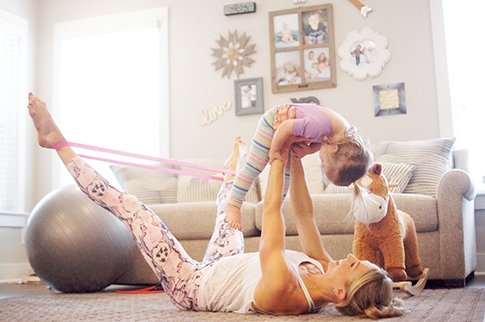
FitElyse spills her best secrets to toning up after delivery day!
So, it’s been a crazy nine months, and you couldn’t be happier with your brand new baby! Life has forever changed — but so has your belly. Yes, having a child is worth it, but if only you could ditch that baby weight for good, right?
I know, mamas! I’ve been there — twice — and it’s tough. These days, new parents are sleep-deprived and exhausted. It feels like almost every waking minute is spent changing diapers, feeding your newborn, changing more diapers, soothing the baby. Did I mention changing diapers?!
There’s not much time for you to take care of you, but without a healthy YOU, it’s hard to have a truly healthy family. So, whether you’ve just been given the okay to work out after having a baby, or if you’ve been waiting and waiting and now that baby is a year old — the time is now. The good news is you can achieve that pre-baby body and even more right at home! And it starts in the kitchen with clean meals.
I know, I know, you don’t have time. But neither do I, but prepping clean meals in advance is key. Otherwise, when the clock hits noon and Baby is finally napping, you’ll be starving and that junk food will call your name.
The crockpot is my go-to. Each week, I make a large batch of steel-cut oatmeal for a nice morning meal. Lunch is often scrambled eggs and veggies, a hummus and turkey sandwich or leftovers. For dinner, I go back to my trusty crockpot. Chili is a staple around our house: beans, beef or chicken, a little onion, and some seasonings is all it takes to create an easy, filling meal.
Between meals, be sure to keep healthy snacks around. (No, the graham cracker off the floor doesn’t count.) Nibble on fresh fruits and veggies, Greek yogurt, cottage cheese, low sugar protein bars and shakes. Eating frequent, small meals will get your metabolism firing like a wood-burning stove.
HERE ARE A COUPLE OF MY FAVORITE FAST RECIPES TO GET ME THROUGH THE WEEK:
Steelcut Crockpot Oatmeal
(Makes 8 servings)
2 Cups of Steel-Cut Oats
6-7 Cups of Water
1 Tablespoon of Vanilla Extract
Optional:
Add in 1-2 Cups of frozen berries, 1-2 Cups of sliced apples or 1 can of unsweetened pumpkin
Directions:
Add all of the ingredients in the crockpot and cook on a low setting for five to six hours. Add more water if needed. In the morning, simply heat and top with a little Greek yogurt and cinnamon!
Green Chicken Chili
(makes several servings)
1 LB Chicken Breast
1 Cup Chicken Broth
1 Small Sweet Onion, Diced
1 Can of Diced Green Chilies
1 Cup of Green Enchilada Sauce
2 Cans of Beans (Pinto, Black, Kidney, Northern, Chili)
Salt, Pepper, Chili Powder to Taste
Directions:
Place the onion in the crockpot and pour in the chicken broth and add the chicken breasts. Cook four to six hours, until the chicken is done. Dice the chicken and add it back into crockpot with all of the other ingredients. Cook on low for one to two additional hours. Try topping with a little cilantro and a squeeze of lime!
EASY EXERCISES WHILE BABY IS NAPPING
While baby naps or does some tummy time, let’s get to work on that tummy of yours. A combo of cardio and resistance training is the best mix.
Here’s a guide to some of my routine:
Frequency: 4-5 times a week. (Aim for 3 days of resistance training and 2 days of cardio.)
Length: 20-30 minutes a day (A 20-minute stroller jog will do wonders for you both.)
Warm-Up: Five minutes of jump rope, jumping jacks, high knees, or running up and down stairs
Exercise Ball Squats
Exercise Ball Crunches
Mini Band Outer Thigh Steps
Push-Ups With Feet on Exercise Ball
Mini Band Back Squeeze
Plank With Mini Band Glute Kicks
Frequency: Cycle through two to three sets or until the baby needs your attention!
Progress in the kitchen is key to a healthy and balanced lifestyle for you and your newborn. A handful of greens, lean meat and a bit of fiber are the first part of the mix. When you add these muscle burning moves and some cardio, you have a recipe for success!
Get your Mini Bands Here SHOP NOW!
Also Available on
Are you looking to spice up your workout routine and improve your health? Exercise balls are a great place to start. They’re in practically every gym, but working out with an exercise ball is one of the best inexpensive, yet effective alternatives that you can take advantage of right at home.
In 1963, Italian plastics manufacturer, Aquilino Cosani, invented the exercise (“Pezzi”) ball — they’ve drastically increased in popularity over the years. From physical therapy in clinical settings to athletic training in fitness facilities, exercise balls are used in a variety of different ways. They’re used for prenatal support and yoga sessions, and it’s even become popular to use stability balls instead of traditional office chairs.
Read on to check out the benefits of using an exercise ball. Plus, get ready to master our step-by-step instructions for top stability ball exercises!
BENEFITS OF USING AN EXERCISE BALL
Exercise balls are popular and trendy among fitness enthusiasts. Here’s why:
Engages more muscles. When pushing off of an exercise ball, instead of a flat surface, more muscles are used to keep the body balanced.
Decreases back pain. A study in the Journal of Strength and Conditioning Research concluded that the use of a stability ball could improve posture and might benefit individuals who sit often or are prone to back pain.1
Strengthens the core. The muscles in the core are used to hold your body in an upright position when you simply sit on your exercise ball. Over time, your core muscles will become much stronger. Plus, you can use your stability ball to intensify exercises that are specifically designed to strengthen abdominal muscles.
Increases Circulation. While using your exercise ball, all of the muscles in your body will be working to help keep you stable — this increases blood flow.
TOP STABILITY BALL EXERCISES
An exercise ball can be used in a variety of ways. Here is a full body stability ball workout routine that can be performed with or without weights:
EXERCISE BALL CHEST EXERCISES
Stability Ball Pushups
Start with either hands on the ball and feet on the floor or with your feet on the ball and your hands on the floor
Push yourself up by extending your arms and then slowly lower yourself
Inhale while lowering your body and exhale while pushing your body up
Perform two sets of 10-20 reps
STABILITY BALL BACK EXERCISES
Stability Ball Back Extension
Lie face down on your stability ball with your hands behind your head. The ball should be under the center of your mid-section
Squeeze your glutes and lift your torso up until your body forms a straight line. Repeat
Perform two sets 10-15 reps
Stability Ball Reverse Hyperextension
Lie face down on the exercise ball with your legs down and extended
Keep your legs extended and slowly raise both legs as you exhale
Lie face down on your exercise ball with your back and legs extended
Keep your arms bent at the elbow with your fist pointing towards the ground
Rotate your arms upward until your forearms are parallel to the floor
Inhale as you bring your arms up and exhale when lowering them
Perform two sets 10-15 reps
Side Deltoid Raise
Place your left side on the exercise ball
Use your left arm to hold onto the ball for stability as you extended your legs outward
Extend your right arm upward and exhale
Slowly lower your arm toward the ground and inhale. Repeat
Perform two sets of 10-15 reps
STABILITY BALL CORE EXERCISES
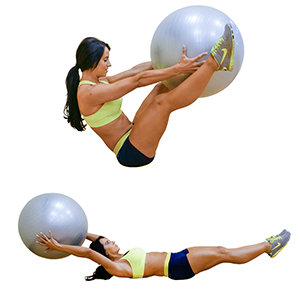
Stability Ball V-Pass
Lie face up on the floor with your arms extended and hold your exercise ball with both hands
Extend your legs in the air, place the ball between your feet, and then lower your legs toward the ground
Raise your legs and grab the ball with your arms extended. Then lower the ball with your arms. Repeat
Perform 15-30 reps
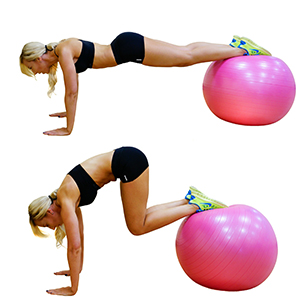
Stability Ball Knee Tuck
Start in the pushup position with your legs resting on stability ball
Inhale, tighten your abs, and bring your knees closer to your chest by pulling your legs forward
Exhale and hold for two seconds
Extend legs to their original position. Repeat
Perform 10-20 reps
STABILITY BALL LEG EXERCISES
Stability Ball Wall Squats
Place the ball between the wall and your lower back
Place your feet shoulder width apart
Inhale and slowly lower your body toward the floor in a squat position as you continuously push back into the ball. Repeat
Perform two sets of 10-15 reps
Lying Hamstring Curl
Lay flat on your back and place your exercise ball under your feet
Dig heels into the ball and extend arms into floor for support
Inhale and use your feet to roll the ball towards your body slowly and keep your hips as still as possible
Exhale and slowly extend legs back to the straight position. Repeat
Perform two sets of 10-15 reps
There are so many different ways to incorporate an exercise ball in your lifestyle. Using these techniques will help strengthen your back and core and stabilize your muscles. Plus, exercise balls are easy to store, portable, and affordable. To maintain your exercise ball, just wipe it clean with soap and water and keep an air pump on hand!
Get your Exercise Balls Here SHOP NOW!
Also Available on


 There’s not much time for you to take care of you, but without a healthy YOU, it’s hard to have a truly healthy family. So, whether you’ve just been given the okay to work out after having a baby, or if you’ve been waiting and waiting and now that baby is a year old — the time is now. The good news is you can achieve that pre-baby body and even more right at home! And it starts in the kitchen with clean meals.
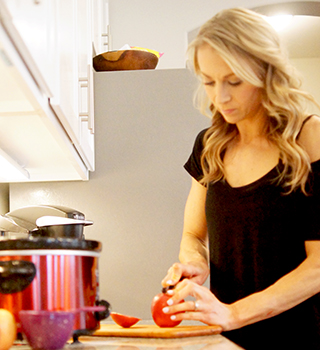 Steelcut Crockpot Oatmeal
 Get your Mini Bands Here

 Get your Exercise Balls Here